Organizing Table Tests in Go

Table tests are one of the approaches to organizing multiple use cases for a single test. In this tutorial, I want to share my approach to how I organize table-driven tests and the structs used for them.
In this tutorial, we will take a look at two similar options:
- Option 1: table-driven tests using a given state, input args, and wantError flag;
- Option 2: table-driven tests using an additional check function;
Table-driven tests with args and wantError
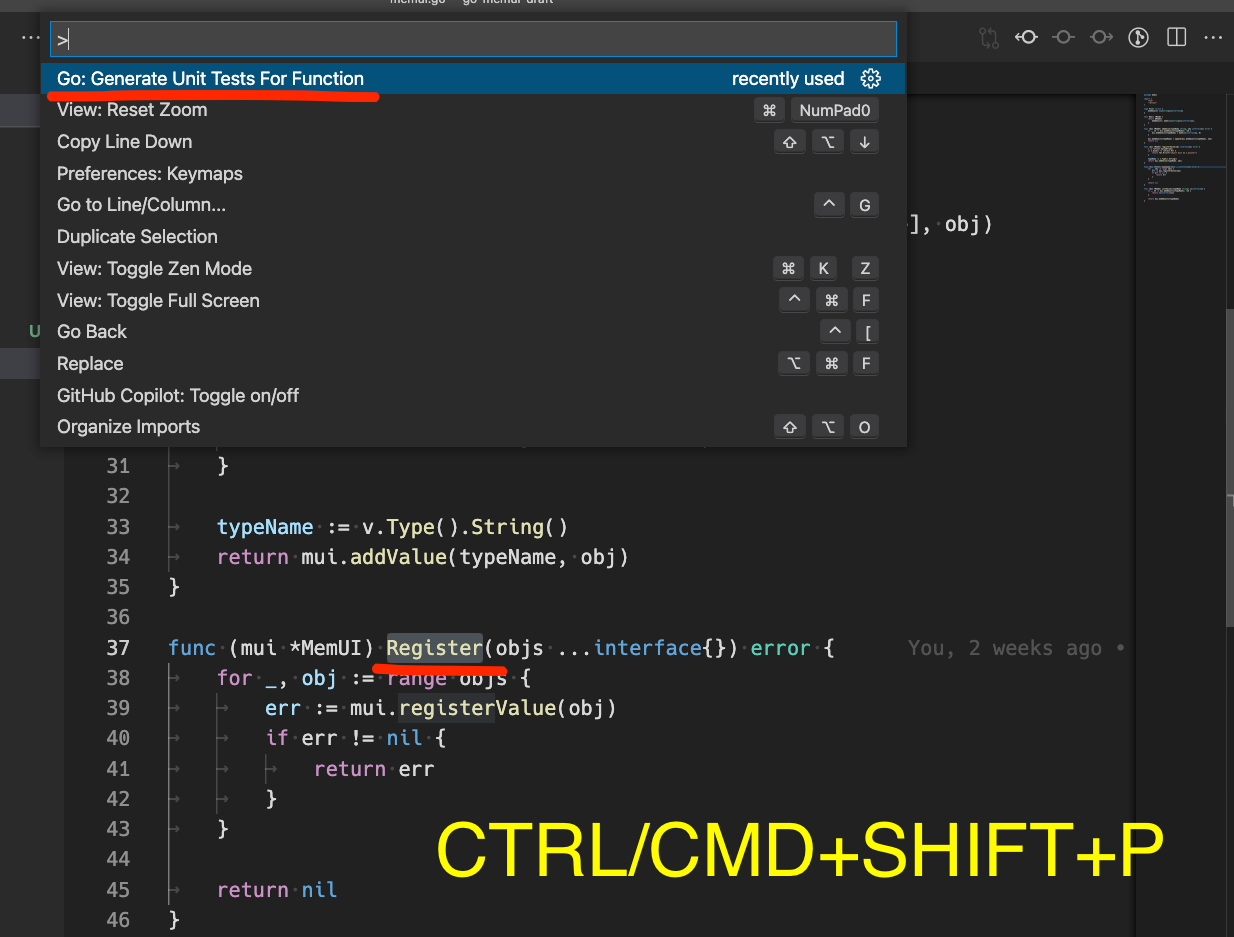
Most IDEs can generate table-driven tests automatically. You only need to navigate to the function and use a command to generate the tests. For example, in the VS Code, you can use the "Go: Generate Unit Tests For Function" command.

For the following function:
func (mui *MemUI) Register(objs ...interface{}) error {
	for _, obj := range objs {
		err := mui.registerValue(obj)
		if err != nil {
			return err
		}
	}


	return nil
}We will have something like this:
func TestMemUI_Register(t *testing.T) {
	type fields struct {
		memObjects map[string][]interface{}
	}
	type args struct {
		objs []interface{}
	}
	tests := []struct {
		name    string
		fields  fields
		args    args
		wantErr bool
	}{
		// TODO: Add test cases.
	}
	for _, tt := range tests {
		t.Run(tt.name, func(t *testing.T) {
			mui := &MemUI{
				memObjects: tt.fields.memObjects,
			}
			if err := mui.Register(tt.args.objs...); (err != nil) != tt.wantErr {
				t.Errorf("MemUI.Register() error = %v, wantErr %v", err, tt.wantErr)
			}
		})
	}
}
VS Code also generates helper structs to organize table-driven tests better. A particularly interesting struct in our example is this one:

It's a slice of anonymous structs that will contain our testing use cases. Example:
tests := []struct {
	name    string
	fields  fields
	args    args
	wantErr bool
}{
	{
		name:    "add pointer object",
		fields:  fields{memObjects: make(map[string][]interface{})},
		args:    args{objs: []interface{}{&Dummy1{Name: "dummy1"}}},
		wantErr: false,
	},
}Here,
- we add one use case called "add pointer object"
- set our internal state before running ->
fields: fields{memObjects: make(map[string][]interface{})} - provide input parameters ->
args: args{objs: []interface{}{&Dummy1{Name: "dummy1"}}} - and, finally, set expectations ->
wantErr: false
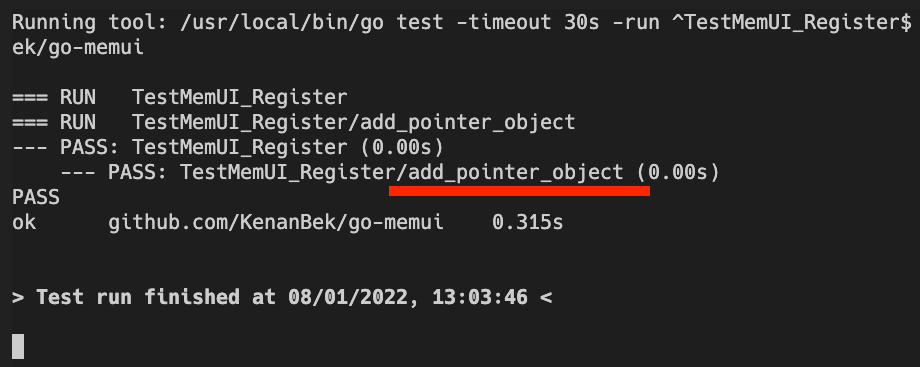
For each use case, our testing logic will execute the given method Register and provide the initial state and input parameters. Please note that each use case is executed as a sub-test, and when we run it go tool's output looks like the following:

wantErr will define if the provided use cases are expected to run with or without error. If the execution does not return an expected output test will fail.
For the following incorrect use-case:
{
	name:    "add value object",
	fields:  fields{memObjects: make(map[string][]interface{})},
	args:    args{objs: []interface{}{Dummy1{Name: "dummy1"}}},
	wantErr: false,
},wantErr to false. The test should fail.We will have:

Thie testing flow is controlled here:
for _, tt := range tests {
	t.Run(tt.name, func(t *testing.T) {
		mui := &MemUI{
			memObjects: tt.fields.memObjects,
		}
		if err := mui.Register(tt.args.objs...); (err != nil) != tt.wantErr {
			t.Errorf("MemUI.Register() error = %v, wantErr %v", err, tt.wantErr)
		}
	})
}
Table tests with a check function
It is all good. But for some use cases, we might need to run additional post-checks. For example, we want to verify the internal state and see if objects were added.
In this case, I usually extend the testing struct and use checks function.
type checks func(t *testing.T, mui *MemUI)
tests := []struct {
	name    string
	args    []interface{}
	wantErr bool
	checks  checks
}{}type checks func(t *testing.T, mui *MemUI) this function, if provided, will be called at the end of each use case and can fail the unit test. Example:
{"add a pointer object", []interface{}{&Dummy1{"t1"}}, false, func(t *testing.T, mui *MemUI) {
	tn1 := "*memui.Dummy1"
	tn2 := "*memui.Dummy2"
	mo := mui.memObjects

	assert.Len(t, mo, 2)
	assert.Contains(t, mo, tn1)
	assert.Contains(t, mo, tn2)
}}
The complete source code looks like this:
func TestMemUI_Register(t *testing.T) {
	type checks func(t *testing.T, mui *MemUI)
	tests := []struct {
		name    string
		args    []interface{}
		wantErr bool
		checks  checks
	}{
		{"add a pointer object", []interface{}{&Dummy1{"t1"}}, false, func(t *testing.T, mui *MemUI) {
			tn1 := "*memui.Dummy1"
			tn2 := "*memui.Dummy2"
			mo := mui.memObjects

			assert.Len(t, mo, 2)
			assert.Contains(t, mo, tn1)
			assert.Contains(t, mo, tn2)

		}},
		{"add multiple pointer objects", []interface{}{&Dummy1{"t1"}, &Dummy2{"t2", 12}}, false, func(t *testing.T, mui *MemUI) {
			tn1 := "*memui.Dummy1"
			mo := mui.memObjects

			assert.Len(t, mo, 1)
			assert.Contains(t, mo, tn1)
			assert.Len(t, mo[tn1], 1)
		}},
		{"add a value object", []interface{}{Dummy1{"t1"}}, true, func(t *testing.T, mui *MemUI) {
			assert.Len(t, mui.memObjects, 0)
		}},
	}
	for _, tt := range tests {
		t.Run(tt.name, func(t *testing.T) {
			mui := New()
			if err := mui.Register(tt.args...); (err != nil) != tt.wantErr {
				t.Errorf("MemUI.Register() error = %v, wantErr %v", err, tt.wantErr)
			}
			if tt.checks != nil {
				tt.checks(t, mui)
			}
		})
	}
}The most interesting part here is how the main execution flow changed:
for _, tt := range tests {
	t.Run(tt.name, func(t *testing.T) {
		mui := New()
		if err := mui.Register(tt.args...); (err != nil) != tt.wantErr {
			t.Errorf("MemUI.Register() error = %v, wantErr %v", err, tt.wantErr)
		}
		if tt.checks != nil {
			tt.checks(t, mui)
		}
	})
}
Now, at the end of each execution, we run an additional verification by running tt.checks.
Summary
Table tests are a good way to organize unit tests and avoid code repetition. You can also refer to this article from Dave Chaney to learn more about table tests.